Layouting
Using the pos and size parameters we can now add buttons to a window and specify where they should be at. We can manually control the layout of a window.
But what if the window is resized? What about the difference in button size on OS X / Linux / Windows? For these things, we need automatic layout. wxWidgets offers this through "Sizers". A more common term is "Layout Managers".
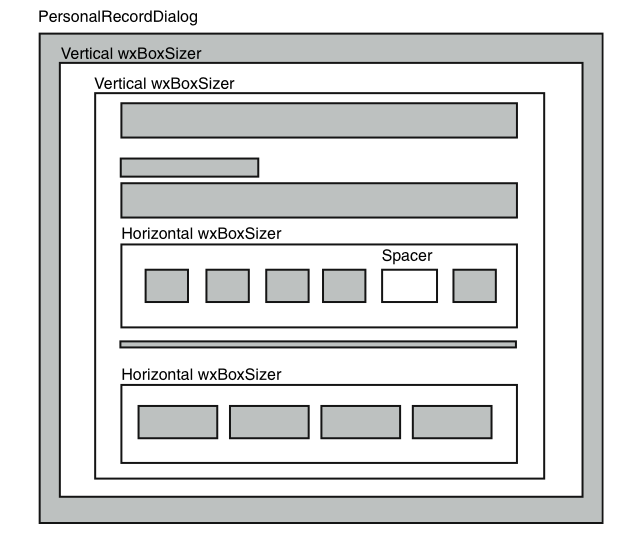
We will look at the wxBoxSizer class. The boxSizer class supports horizontal or vertical stacking of controls. Each boxSizer may contain other boxSizers.

To support automatic layout, each control has a minimum size, or sometimes called "best size". It will report that back to the sizer for layouting.
To use sizers, first create an object of the wxSizer class, using either wxVERTICAL or wxHORIZONTAL as parameter.
wxBoxSizer *sizer = new wxBoxSizer( wxVERTICAL );
You may then add elements, either controls, or other spacers:
void Add(wxWindow* window, int stretch=0, int flags=0, int border=0);
void Add(wxSizer* window,  int stretch=0, int flags=0, int border=0);
Where the parameters mean:
- window
the element to be added to that sizer
- stretch
a stretch factor. If the sizer is larger than the sum of its contents, what should happen? If the stretch factor is 0, the elements will stay the same size. If it is > 0, then each element will be stretched in relation to the sum of all stretch factors.
- flags
-
defines additional info for resizing:
- 0
the client window will preserve its size
- wxGROW
the client window will grow to fill the space
- wxLEFT, wxRIGHT, wxTOP, wxBOTTOM
specifies where the borders go
- wxALL
border on all edged ( = wxLEFT | wxRIGHT | wxTOP | wxBOTTOM)
- border
size of the border
To set a sizer, use the SetSizer(wxSizer sizer) method
Example:
Adding two buttons, on top of each other, with a 10 pixel border around them:
wxBoxSizer *sizer = new wxBoxSizer(wxVERTICAL);
sizer->Add(new wxButton(this,wxID_YES),0,wxALL,10);
sizer->Add(new wxButton(this,wxID_NO),0,wxALL,10);
SetSizer(sizer);
Practice:
Create two buttons "Ok" and "Cancel" (wxID_OK and wxID_CANCEL) and add them to a horizontal sizer, with Ok on the left and Cancel on the right. Put a small border (2 px) around the buttons.
You can create "static text" (text that cannot be changed by the user) using the wxStaticText class.
wxStaticText(wxWindow* parent,
  wxWindowID id,
  const wxString& label,
  const wxPoint& pos = wxDefaultPosition,
  const wxSize& size = wxDefaultSize,
  long style = 0,
  const wxString& name = "staticText")
Most parameters are similar to the ones for the button. Label describes the contents of the text. You may change the label later using the void SetLabel(const wxString& label) function. Please note: To change the label later, you will need to keep a reference to it. A good idea would be to declare an attribute for the changing label, and to use that. Example:
class MyFrame: public wxFrame
{
private:
    wxStaticText *someText;
//...
wxBoxSizer *sizer = new wxBoxSizer(wxVERTICAL);
someText = new wxStaticText(this,wxID_ANY,wxT("This is a Text"));
sizer->Add(someText);
sizer->Add(new wxButton(this,wxID_OK),0,wxALL,2);
SetSizer(sizer);
//...
someText->SetLabel(wxT("Ok, Ok, i give up!"));
Warning! If you're widgets get much bigger / smaller, you will have to tell youre sizer(s) to re-layout. For this, you will have to keep them in an attribute as well. Example:
private:
  wxBoxSizer *sizer;
//...
sizer->Layout();
And, last but not least you may resize your window to fit the contents. Use the Fit(wxWindow&) method for that. Example:
sizer->Fit(this);